Page 2: Angles and Turning
Unit 1, Lab 3, Page 2
On this page, you will learn about sprite turning angles, which are needed for drawing polygons. For starters, you’ll draw various asterisks, like these:
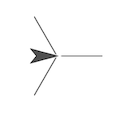
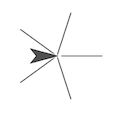
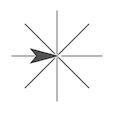
When you were trying to draw an equilateral triangle on the previous page, you might have tried code like this:
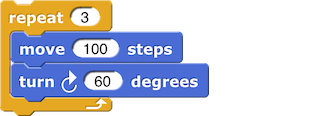 and seen a result like this:
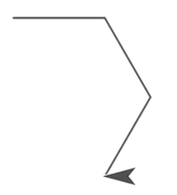
It’s common to try this if you’ve learned that the angles in an equilateral triangle are all 60 degrees. However, the angle that the sprite needs to turn to make a triangle is actually 120 degrees, and it’s important to understand why that is and how to find the correct angle for other polygons (five-sided, eleven-sided, etc.).
Perform the four experiments (A-D), and read the comments attached to each one. As you do, talk with your partner about what you see and why it happens.
Then, experiment with the last script (shown right):
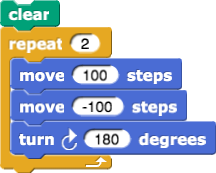
- Experiment with a quarter turn (
turn90 degrees instead of 180). Adjust the number of repetitions (the number you give torepeat) until you get the sprite to finish facing the same way it started.
- Experiment with a tenth of a turn (
turn36 degrees). What input must you give torepeatto get the sprite to finish facing the same way it started? - Without trying it on the computer, figure out what turning angle to use for a five-spoke asterisk. Make sure your partner agrees.
- Then, try the experiment.
- Experiment with a quarter turn (
With your partner, state what you’ve learned about turning angles.
At the top of the page you were thinking about triangles. As a step in that direction, make a three-spoke asterisk.
A 360° turn is a full turn. Half of that (180°) is a half turn. A fourth of 360°  is a quarter turn. You don’t have to do the division yourself. Snap! can compute it for you. You can use
  or
or  to get a seventh of a turn or a third of a turn.
At the beginning of this page, you knew that to make a triangle you need 120° turns, but maybe you weren’t sure why. Now you know why a three-spoke asterisk takes 120° turns, but what does that have to do with triangles?
Try different negative input values for the
move -100 stepsblock (first -90, then -50, then -10), and do some of the turning experiments (above) with each value. Does this change the values needed for therepeatorturnblocks? These pictures are called “pinwheels.”
-
Change the inputs in script A to draw an asterisk with:
- 5 branches
- 8 branches
- 3 branches
-
Make a copy of the three-branch script you built (right-click or control-click the script, and choose “duplicate”).
-
In the copy, remove the
move -100 stepsblock. - What does this new script do?
-
In the copy, remove the
-
Make another copy of the three-branch script you built, and then:
- Change it to a four-branch script.
-
Remove the
move -100 stepsblock again. - What does this new script do?
Debugging with say for
You can use  to get information about the state of your program while it’s running.
This animation shows how to use say for to determine the bug in code that is supposed to draw a rectangle. Notice how say for makes the program pause and gives you information to help you identify the source of error.
-
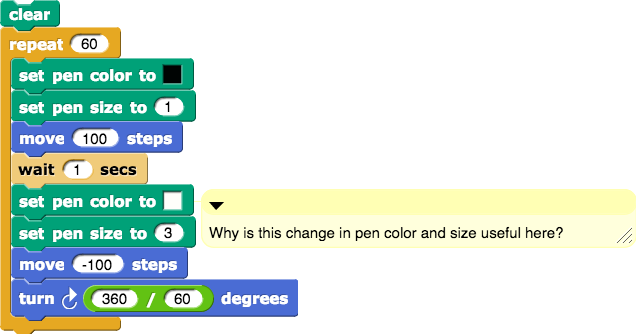
Script B in the same file shows how you can make a 60-branch script behave like the second hand of a clock. Try it out.
-
 Be sure you are able to explain how this script does what it does.
-
Why is the change in pen color and size useful here?
-
-
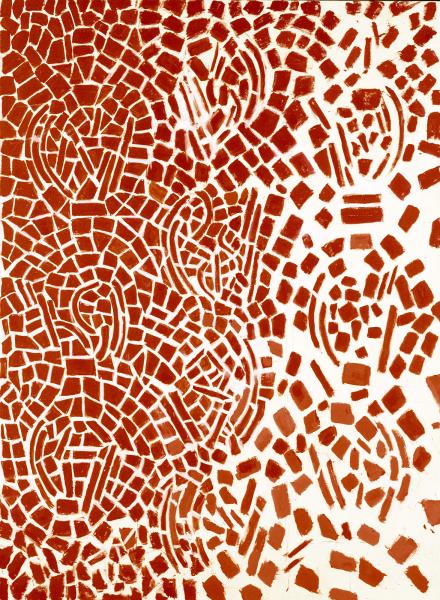
At the right is a painting by Alma Thomas. See what it inspires you to do.
It’s your art. Take liberties.Gamal: It looks like a map. Houses on the left, the town center on the right, with City Hall and the fire station and the mall.
Betsy: Maybe. To me the part on the left looks a little like a fingerprint, and the part on the right is clearly a person facing right, with her nose up against the right edge, halfway down.
Alphie: Never mind what it looks like. How are we going to make something that looks like it?
Betsy: Parts of it look like curved, thick dotted lines. We could do something like this:
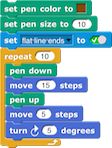
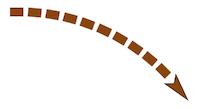
But I’m not sure how to get a bunch of those to fit together.Alphie: Randomness is your friend. Let’s make a bunch of your lines, all different, and just point them in different directions.
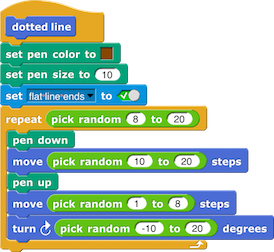

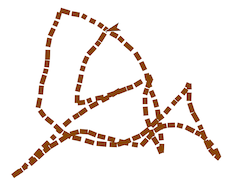
Betsy: Wow! That’s very cool.
Alphie: Nothing like what it’s supposed to look like, though.
Betsy: What do you mean, “supposed”? Go read the boldface line up above this blue box again.
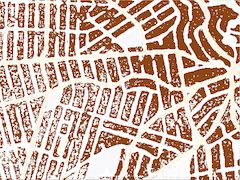
Alphie: Yeah, I know, but “take liberties” doesn’t mean “take whatever happens on your first try.” I have another idea. We’ve been thinking of Thomas’s picture as brown boxes on a white background, but it’s actually more brown than white. What if we start with a brown background and draw white lines on it?
Gamal: What about that town center on the right?
Betsy: It’s not a map. But to make you happy, when drawing white lines over toward the right, we can make them thicker, so the right part will have more white space than the left part.
Alphie: Uh oh… If you look carefully at the original picture, the brown boxes aren’t all the same shade of brown.
Betsy: Alphie, you worry too much. But to make you happy, once we have the space divided into brown regions, we can
 some of them in different colors.
Gamal: Hey! Gang! Remember we imported that crayon library? Guess what! There’s a “World Map” library, too! And it makes “watercolor” maps like this:

And then I went over every dot on the stage using and
and  to decide whether to make each dot white or brown:
- What did Alma Thomas intend by her painting: a map, a fingerprint, or something else? Do some research.
.png)
.png)
